How to Know Where You Are without Electronics
SHARE THIS POST
If you have never been lost stop reading, or, if you have complete and utter faith in all your electronic gadgets, go watch a ballgame. However, if you have ever misplaced your vehicle or campsite, this may be of interest. Everything seems to have GPS in it, but at some point there will not be any reception or your batteries will fail.
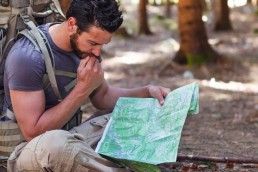
The first step in preventing yourself from getting misplaced is before you take the first step in the woods, study a map of the area you want to explore. You can see and avoid many problems before they occur. Google Earth, and similar sites available, are great for “flying” around the world and zooming in for incredible detail, but has two limitations: It needs power, and as you gain detail you lose the big picture. To get both, nothing beats the gold standard of paper maps—USGS Topographic Maps. The series gives you more than enough detail to plan your adventure. You can find all available maps at store.usgs.gov.
Reading a map is relatively easy—water and swamps are in blue, forested areas are in green and white is everything from woodlots to farm fields. The unique and useful thing about topo maps is that they show relief or the shape of the land. The brown lines are called contour lines. Each line represents a specific elevation above sea level. Change in elevation from one line to the next is determined by the contour interval, which is shown in the bottom center of the map. The number from one line to the next indicates that change. For example, if the contour interval is 10, it means that you would go up or down 10 feet if you walked from one line to the next. The closer the lines, the steeper the slope. The farther apart they are, the flatter it is. Concentric rings are hills; concentric rings with dashes are depressions.
A second piece of information on topo maps is the magnetic declination. Magnetic declination is the difference between True North, N 90º, W 0º, and Magnetic North, where your compass points. Magnetic North wonders around over the millennia and right now is near N 83º, W 120º. This difference can be from 0 degrees to 4 or more in the Midwest. The small arrows in the “lower left corner” tell you how much you need to adjust your compass and in which direction.
As you plan your hike first make a “box” of the area you are going to explore. Find four land marks, high points if possible, for each of the corners with one of the corners being your starting point. These corners should be in the cardinal directions, if possible. When you are hiking, as long as you stay within this arbitrary box you will know where your staring point is. Another way is to find one really big landmark that is in the center of your area and note its direction from your starting point. Also, make note of any straight-line features such as roads, power lines or a line of hills that might serve as boundary markers.
The second thing is to make a general plan of your hike, visualize it: Where do you plan to be at noon? Which side of the ridge or lake or swamp are you going to hike along? You will realize you are misplaced sooner if you “kind of” know where you should be. It helps if you have an idea of your walking pace and how long it will take you to get back from the farthest corner of your box. I set my watch for a “starting back” time. I get really engrossed in exploring and far too often I have spent time wondering around the woods in the dark. It is a good idea to write out your general plan (area and time expected to be back) and leave it in your vehicle so that if you get injured, any rescuers will have an easier time getting to you.
One problem is we get so caught up in looking for game sign or whatever, that we don’t keep track of where we went and how we got there. As you hike along, make sure that you note specific landmarks and look back at them often so you can recognize them if coming from the opposite direction. Consult your compass on a regular basis, and each time make a mental calculation of the straight-line direction back to your starting point. Also, make note that your “corners” are still in the general direction they should be.
Are you enjoying this post?
You can be among the first to get the latest info on where to go, what to use and how to use it!
So, some hours pass and you need to start back and you realize that you don’t quite know where you are. The first thing is to just sit down and take five. If you have been using your eyes and compass or if you have stayed inside your box and you did your kitchen table homework you should be able to put map features to actual features and determine which way is home. For a variety of reasons—trees, lakes, and swamps—you really just can’t walk in a straight line. Even with a compass the only sure way to walk a straight line is to line up at least two objects, preferably three, and when you get to the first one line up two or three more. Even this method doesn’t always work if you have lots of obstacles such as aforementioned swamps or ponds, hills and valleys. Not to worry, as long as lakes and hills stay where your map says they should be, you will make it back.
If for some reason you don’t have a compass there are ways to find N-E-S-W (direction). First of all, do not trust any method of finding north that involves “biological” or “meteorological” methods: Moss doesn’t only grow on the north side of trees, spiders put their webs where they can and the wind doesn’t always come from the west. The only surefire way of finding direction without a compass is astronomically—sun, moon and stars.
During the early morning and late afternoon it is easy to tell direction from the rising or setting sun. Even on cloudy days you can tell east or west by what part of the sky gets lighter first or darker last. However, during midday it is more difficult to discern, so the “20-minute stick method” is the quickest way to get you on your way. Find a clear area and poke a long stick—any shaped stick as long as it has a single sharp tip—in the ground. Put a small pebble or mark at the tip of its shadow. Wait for 10 minutes and put another mark at the tip of its shadow. While you are waiting you can be studying your map and the surrounding land for landmarks and possible routes. After another 10 minutes, place a third mark. Since the sun moves east to west, these three marks will make a rough line that runs approximately west (first mark) to east (third mark).
If you have an analog watch—you know those old ones with two hands that go tic-tock—you can use it as a way to find north also. Hold it horizontal. Align it so that the sun is half way between the hour hand and the 12. The 6 will point approximately to the north.
Even though you don’t want to be wondering around at night, it is helpful to know how to find direction from the stars and the moon. If it’s a clear night you can find the North Star/Polaris by using “The Big Dipper.” The two stars of the ladle opposite the handle point toward Polaris. Spread the fingers of your hand as wide as you can, line up the two “pointer stars” and your thumb and little finger, and your little finger will just about be on Polaris. The moon is also a reliable compass. During a crescent moon, an imaginary “line” drawn across the tips points toward Polaris. When you see a waxing crescent (right side lit) the sun is to the west, while a waning crescent (left side is lit) the sun is to the east. Even during a full moon, the dark maria from a crescent points north. Also, the sun will be opposite of the moon. When you find north, make a “direction arrow” of sticks or stones in the morning, even if it is foggy or cloudy, you have a starting direction.
Finding your way home can be satisfying challenge. The difference between being “misplaced” and being “really lost” is planning your outing, staying very aware of your surroundings and the sky and training your memory to pay attention to detail.
MWO
SHARE THIS POST
Did you enjoy this post?
You can be among the first to get the latest info on where to go, what to use and how to use it!
Doug Thalacker
Doug Thalacker has a Masters of Environment Science from UW-SP and taught high school environmental science and earth science. He has outdoor/wilderness training through Outward Bound and American Red Cross. He has a lifetime of enjoying any activity that involves fields, woods or waters.


