Finding the Strike Zone
SHARE THIS POST
Mike Schoonveld tells how a lesson from walleye pro Lance Valentine taught him a new method for locating the strike zone.
Fishing with walleye pro Lance Valentine on Saginaw Bay made me reconsider how I troll for walleyes, salmon or other fish from my own boat. I was there to experience big-water fishing on a pontoon boat, but Lance’s method of finding the “strike zone” was an unexpected lesson.
Finding your depth
There are several components to a successful day of trolling for walleyes. None is as important as finding the depth producing the most hits, then putting the maximum number of lures in that zone.
Most anglers do it using a shotgun approach, employing a combination of deep-diving or shallow-diving lures, diving planers, leadcore, weighted lines and/or copper line. The goal is to put lures in all the possible areas of the water column where the active walleyes may be hanging. This is not the approach taken by Lance Valentine.
Lance puts all his “eggs” in two baskets. Besides years of experience telling him likely areas and depths to fish, Valentine watches his sonar to make sure there are fish in the area he’s fishing. He’s much more interested in the marks showing suspended fish in the water column than the ones belly to bottom. “Those suspended walleye are active fish. They are the ones most likely to bite trolled lures. Though a walleye will swim up to bite a lure passing overhead, I know I’ll get more bites by putting my lures in the narrow, 3 or 4-foot zone where the most-active fish are suspended and feeding.”
Other anglers agree and will stagger the depths they are presenting their lures, using one lure that will troll 8 feet deep, another that will go 12, another at 15 and perhaps one at 18 feet. But, with only one lure at each depth, how long does it take to learn the 15-foot level is best? A walleye will swim horizontally to chase a lure, but how far? If it will swim 6 feet, but the lure is 10 feet away, you won’t catch it, and you’ll never know the lure is at the perfect depth.
Are you enjoying this post?
You can be among the first to get the latest info on where to go, what to use and how to use it!
So, what Valentine does is put all the lures trolling on one side of his boat at the same depth and all the lures on the other side at a different depth. He does this by using line-counter reels and letting out specific amounts of monofilament before attaching his in-line planer to line.
One place you don’t want to vary your presentation
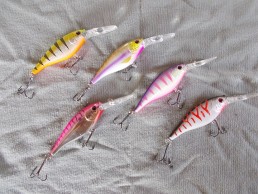
To simplify the process, Lance uses identical lures (except for color) on every line. Valentine said, “By using identical lures, except color, I can zero in on the best depth and be certain the results aren’t being confused by other factors.”
By putting all the lures on one side of the boat at the same depth, if that’s the “active-fish” zone, Valentine will know quickly. No bites? Adjust them all higher or lower. If, in a short period, he gets more bites on the lures trolling on lines set 40 feet behind the planers on one side than on the ones set 60 feet behind the boards on the other, he will adjust the lead-length on all of the lures on the less-active side.
Once he gets all the lures in the active layer of water, he can then zero in on specific colors. “Most of the time, once I get all the lures into the strike zone, I’m getting enough action on all or most of them, I don’t even have to worry about switching from golds, to silvers, to painted,” he said.
Even a seasoned outdoorsman can learn something new. Check out the winter issues of MidWest Outdoors, available at the newsstand or by subscribing on our website.
MWO
SHARE THIS POST
You may also like...
Nothing found.
Did you enjoy this post?
You can be among the first to get the latest info on where to go, what to use and how to use it!
Mike Schoonveld
A passion for hunting, fishing, trapping and an outdoor lifestyle has been true north on Mike Schoonveld’s compass his whole life. One of the Midwest’s most prolific outdoor communicators, scores of his columns have been published in the pages of MidWest Outdoors since the first one appeared in 1987.
