Trail Camera Tips and Tricks
SHARE THIS POST
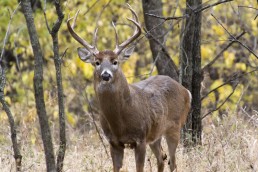
Todd Amenrud uses his trail cameras to keep an eye on the prize even before hunting season begins.
Those “furry crowns” (antlers) have grown enough now, so we can distinguish individual bucks. That means it’s time to get your trail cameras working. Information is the most important part of creating an ambush for a mature buck or making sound management decisions, and trail cameras are the most effective means we have of collecting it. Give these ideas a try to get the most from your trail cameras.
Choose the right camera
The three most important features are a quality lens, an effective infrared flash and a quiet shutter. You may also want certain other features like better resolution, time-lapse, burst mode, video, password protection or built-in viewer. It all depends upon your personal needs—but like most things, you get what you pay for.
Remove all obstructions
After you place your camera, cut branches, weeds and twigs out of the way. Make sure your lens and infrared flash have a clear path to your target area. If a large, sun-saturated branch is passing in front of the camera’s sensors, you’ll have an SD card full of buck-less images.
Angle the camera
If you’re trying to capture animals passing straight across the camera’s path, try to angle the camera to the trail rather than placing it totally perpendicular. Trigger speeds have come a long way, but if you’re covering a trail or a passage where the animals will pass by quickly, it’s best to angle the camera (about 45 degrees) rather than placing it perpendicular to the trail. If at a right angle, and the animal passes through the sensor area traveling fast, you may only have an image of a hind-end, if anything.
Watch the angle to the sun!
The best images will usually have the sun at the camera’s back, or angled from the side. As a rule, place the camera south of your target. At times, you may get away with facing your cameras to the south; it depends upon the time of the year, as the sun’s angle to the earth will change. It’s really the sunrise and sunset that you should try to avoid. However, if you have a nicer camera, sometimes you can achieve some beautiful effects by catching some of the sun in your image.
Concealing the camera
Deter camera crooks by concealing the camera, securing it to a tree, hanging it in a hard to reach spot or placing it in a locked steel box. First, use some common sense—don’t hang your camera in an obvious location if you expect human traffic passing by. A camera hanging on a trail, next to a feeder or at a gate opening may be a bit too tempting, and oftentimes trespassers will take or destroy them so there’s no evidence of their unscrupulous act. Find a less obvious spot and camouflage the camera into the surroundings.
Are you enjoying this post?
You can be among the first to get the latest info on where to go, what to use and how to use it!
Use scent for a stopper
Create a “signpost” in a spot where there is obvious animal traffic. In fact, it doesn’t need to be whitetail scent—fox or coon urine are two of my favorites. Most animals want to “claim their territory,” and will often stop to urinate over the last animals’ deposits, letting the others know, “I live here, too.” A signpost is a great “stopper” so the deer may pose for a photo.
You may also use a traditional scent setup. Not only can this get them to pose, but can also attract them to the spot from a distance. A little Trail’s End #307 or Golden Buck will work during early season or after the rut, and Special Golden Estrus is perfect during late October through November. Place the scent on a Key-Wick and then put it on a branch or twig, about four feet off the ground.
Mock scrapes work amazingly well to take inventory of the bucks in your area. You may not get many photos of does, but from early October into December, bucks are instinctually drawn to scrapes. You can “doctor-up” a buck’s natural, existing scrape or make your own “mock scrape.” A Magnum Scrape Dripper with Active Scrape or Golden Scrape will work best for this tactic. The best part of this approach is you usually get numerous photos of the buck from several angles as they work the licking branch.
Filing your photos
Develop a system for filing your photos. To effectively manage a property, you must be good at keeping records. Trail camera photos help to gather information on mature bucks and document trends over the years, and there is no better way to determine density, buck-to-doe ratio, or the age structure of your herd. Nowadays, a property manager on a 500-acre parcel can collect 200,000 images or more in one season, so it’s important to find a way to organize your images, so you can find them when they’re needed.
To prepare for fall hunting, check out the August issue of MidWest Outdoors, available the first full week of August at the newsstand or by subscribing on our website.
MWO
SHARE THIS POST
You may also like...
Nothing found.
Did you enjoy this post?
You can be among the first to get the latest info on where to go, what to use and how to use it!
Todd Amenrud
Todd Amenrud is a full time sportsman whose passion is bowhunting whitetails. He spends considerable time researching whitetails, and has written six books on the subject. Harvesting 47 record-book animals and his ability to share his knowledge have made him one of the Midwest’s most-recognized hunting resources.
